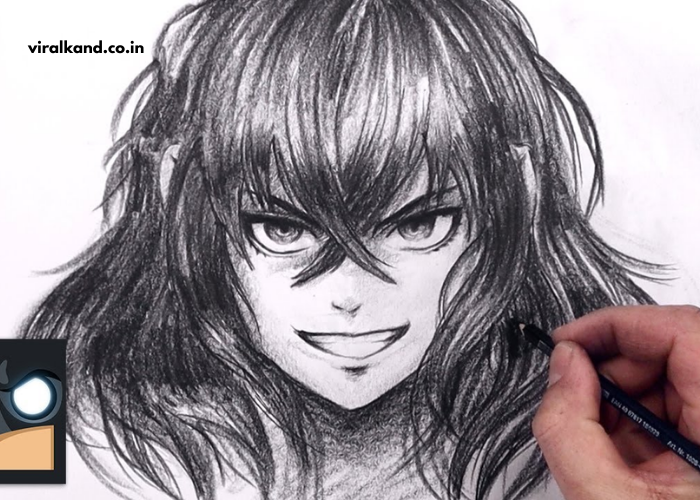
Inosuke Hashibira is one of the most beloved characters from the anime Demon Slayer (Kimetsu no Yaiba). Known for his wild boar mask, fierce fighting spirit, and unique personality, Inosuke has become a fan favorite. If you’re an anime drawing enthusiast or a beginner looking to capture this character’s fierce presence on paper, you’re in the right place.
This blog will walk you through an easy, step-by-step guide to drawing Inosuke. Whether you are just starting your art journey or you have some experience with drawing anime, this guide will help you draw him in a fun and approachable way. You don’t need to be a professional artist to create a stunning Inosuke drawing. With a little practice and patience, you can create a fantastic representation of this dynamic character.
Key Points:
- Learn how to draw Inosuke step by step.
- Understand basic techniques for sketching anime characters.
- Focus on key features to bring Inosuke to life on paper.
What Are the Basic Steps to Draw Inosuke?
When you’re ready to begin your Inosuke drawing, it’s important to follow a series of steps that will guide you through the process. These basic steps will allow you to build up the drawing gradually, ensuring each feature is in proportion and captures Inosuke’s unique character.
Step 1: Start With Basic Shapes
The first step in drawing Inosuke is to sketch out the basic shapes that will form the foundation of the character’s body and face. Begin by drawing a circle for the head, followed by an oval shape for the torso. Don’t worry about details at this stage — focus on the basic structure.
Inosuke’s body is muscular and slightly hunched, so make sure to sketch the rough outline of his shoulders and arms. For the legs, use elongated ovals to define the length and posture of the limbs. The main goal here is to establish the character’s pose and proportions before adding any details.
Step 2: Add Facial Features
Inosuke’s face is one of his most distinctive features, and getting it right is essential. His boar mask is an important part of his look, so carefully sketch the mask’s shape first. Inosuke’s facial features are intense and full of emotion, so focus on the eyes, nose, and mouth when refining the face.
- Eyes: Inosuke’s eyes are wide and intense. Draw the eyes near the top of the face, with large irises to convey his fierce and wild nature.
- Nose and Mouth: Inosuke has a sharp nose and mouth that contribute to his tough appearance. Make sure his expression reflects his energetic, brash attitude.
Step 3: Outline the Body and Details
Once the head is well-defined, proceed to the body. Inosuke has a muscular build, so be sure to emphasize the muscle definition in his arms, chest, and legs. Focus on his clothing as well — his Demon Slayer uniform consists of a simple dark vest with straps and his boar mask.
You can also draw his weapons at this stage. Inosuke wields two swords, so sketch them along his sides, making sure they are proportionate to his body. His stance should be dynamic and action-ready, so don’t hesitate to add motion lines to show movement and energy.
Step 4: Refine Details and Add Shading
At this point, you can start refining your Inosuke drawing by adding shading and additional details. Shading will help give depth to the character and make him look more three-dimensional. Pay close attention to the lighting source in your drawing, and add darker tones on the areas that would be in shadow, such as under the chin, along the muscles, and beneath the boar mask.
The details on Inosuke’s boar mask are intricate, so take your time here. Add texture and definition to the fur around the edges of the mask and ensure the ears are prominent to highlight his animalistic features.
| Step | Key Focus |
| Step 1: Basic Shapes | Draw the head, torso, arms, and legs using basic shapes. |
| Step 2: Facial Features | Focus on the boar mask, eyes, and mouth. |
| Step 3: Body Details | Add muscle definition and sketch Inosuke’s weapons. |
| Step 4: Refine & Shade | Add shading, texture, and final details. |
Note: Don’t rush the process. Take your time to get each step right, as this will lead to a better final drawing.
How Can You Improve Your Inosuke Drawing?
Drawing Inosuke can be challenging, especially if you’re new to anime drawing. However, there are several techniques and tips that can help improve your skills and bring your Inosuke drawing to life.
Practice Proportions
One of the keys to making your Inosuke drawing look realistic is getting the proportions right. Anime characters typically have exaggerated features, such as large eyes and small noses, but their body proportions should still be consistent. Practice drawing different poses of Inosuke, paying attention to his muscular build and maintaining the right balance between the head, torso, and limbs.
Study the Character’s Design
It’s always helpful to study the design of Inosuke in the original Demon Slayer anime or manga. Look at how the character is drawn by the official artists and try to replicate their style. Focus on the specific details that make Inosuke unique, such as his boar mask, wild hair, and the dynamic lines in his action poses.
Add Personal Style
Once you’re comfortable with the basic structure and style, feel free to add your personal touch to the drawing. Play with different poses, expressions, and even use your own interpretation of the character. The beauty of art is that it allows you to express your creativity.
| Improvement Focus | Example Activity |
| Practice Proportions | Draw Inosuke in various poses and body angles. |
| Study the Design | Review Demon Slayer visuals to capture Inosuke’s look. |
| Add Personal Style | Try different backgrounds or adjust his facial expression. |
Reminder: Make sure to sketch lightly at first to easily erase and correct mistakes as you go.
What Tools Do You Need to Draw Inosuke?
Having the right tools can make the drawing process more enjoyable and efficient. Below are some essential tools that will help you with your Inosuke drawing.
- Pencils: Use a variety of pencils, such as a 2H for light sketching and a 4B or 6B for shading and darker lines.
- Eraser: A good eraser is essential for making corrections and refining your drawing.
- Paper: Choose smooth drawing paper that can handle pencil shading without smudging.
- Colored Pencils or Markers: If you want to add color to your Inosuke drawing, colored pencils or markers are great options for filling in his hair, skin tone, and clothing.
| Tool | Use |
| Pencils | Different types for sketching and shading |
| Eraser | For corrections and refining details |
| Paper | Smooth texture to avoid smudging |
| Colored Pencils/Markers | For adding color to your drawing |
Note: Don’t feel pressured to use a lot of colors. Simple shading can make your drawing just as impactful.
Conclusion
Drawing Inosuke Hashibira from Demon Slayer is a rewarding experience, and with this step-by-step guide, you now have a foundation to begin creating your own artwork. Remember, the key to success is practice. The more you draw, the better you’ll get, and soon you’ll be able to draw Inosuke with confidence and ease.
Whether you’re drawing for fun or looking to improve your skills, taking your time with each step will ensure that your Inosuke drawing looks impressive. Keep experimenting with new techniques, and don’t forget to enjoy the process.
FAQ’s
- How do I start drawing Inosuke?
Begin by sketching basic shapes like circles and ovals for the head and body, then gradually add details such as the face, boar mask, and weapons. - What is the best way to practice drawing Inosuke?
Practice different poses and expressions to improve your understanding of his proportions and dynamic features. - Can I draw Inosuke with different facial expressions?
Yes, feel free to experiment with various facial expressions to capture his energetic and wild personality. - What tools do I need to draw Inosuke?
Basic tools include pencils, erasers, paper, and colored pencils or markers for adding detail and color. - How long will it take to draw Inosuke?
The time it takes to draw Inosuke varies, but beginners can expect it to take around 1-2 hours, depending on the level of detail.